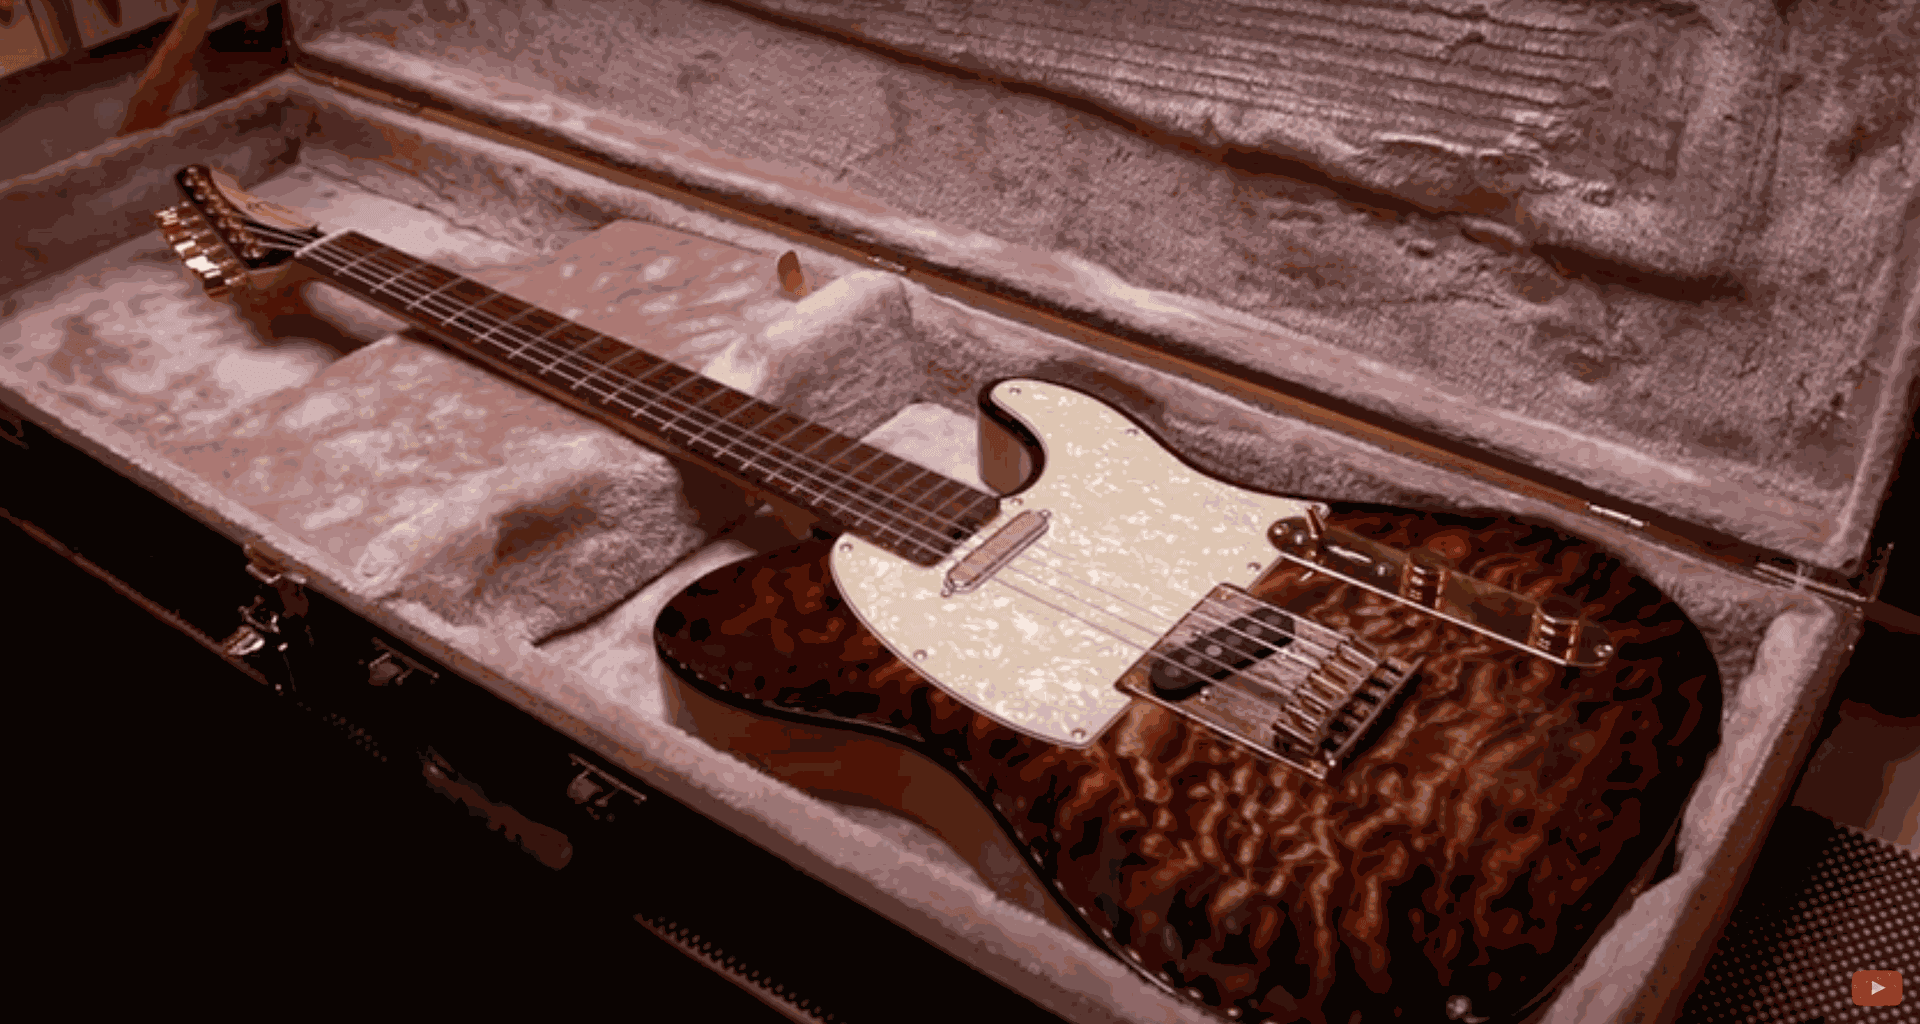
How to Build a Telecaster guitar with a CNC Milling Machine
This guitar was imagined and designed by Hussein of Barada Guitars, with the help of his friend Austin, who lent his expertise to the design of the CAD files.

Roldan Descamps
CEO
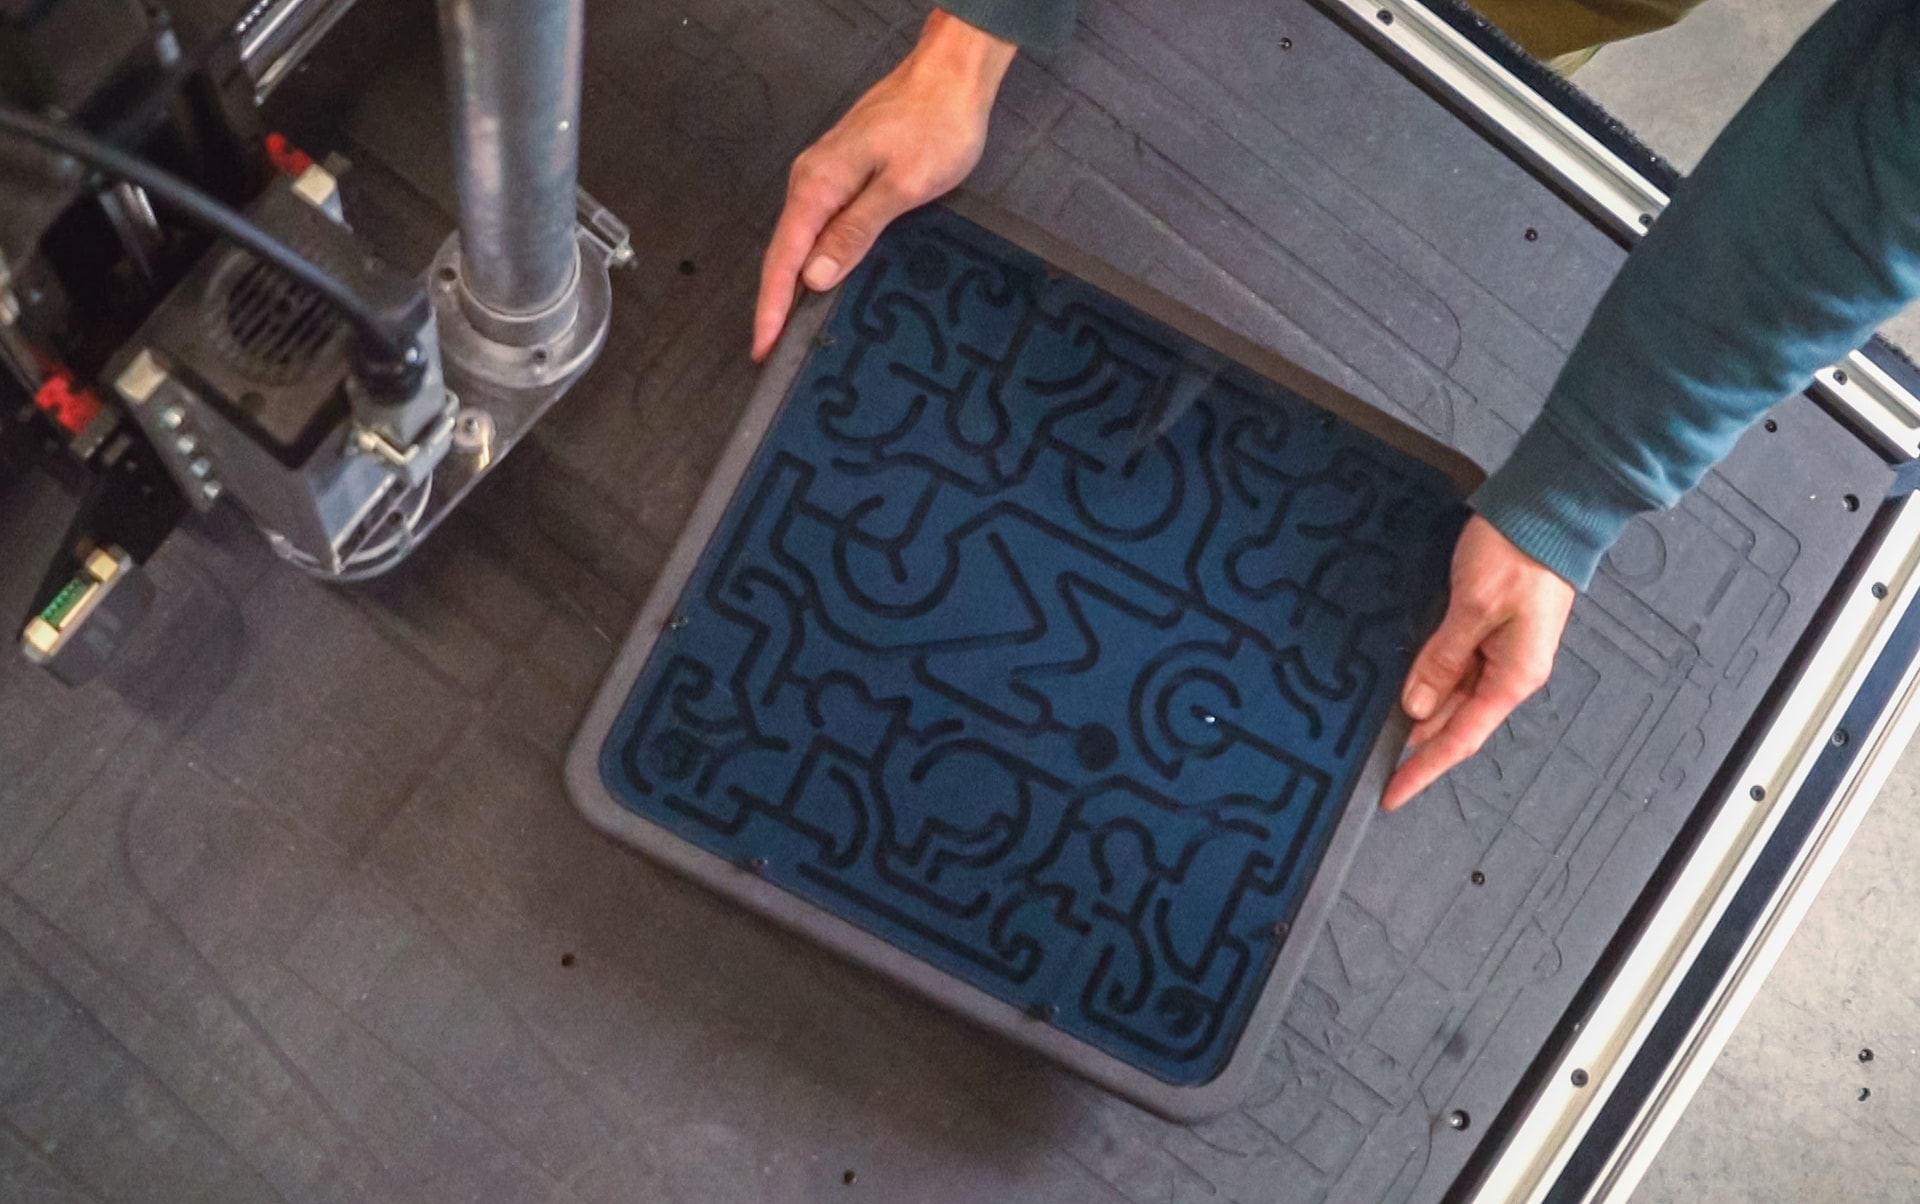
This guide will teach you how to create a marble labyrinth made of wood and how to program some basic CNC milling operations.
This is an easy project to get started with your CNC machine.
We'll follow our Mekanika maze design, but feel free to draw your own maze and adapt the design as you like.
If you want to follow our design, you can download the files here.
3D files (various formats) and G-Codes
But you can also create your own maze in a sketch if you prefer.
We'll be using an 18 mm MDF panel for the body, but you can use any other material.
If you use our files, make sure your panel is 18 mm thick; otherwise, you'll need to adapt the G-codes.
For the cover, we'll use a 2.5 mm transparent PMMA panel to keep the marble from escaping. Feel free to use any similar panel as long as you adapt the design if needed.
The marble is a 6 mm steel marble. Make sure to note your marble's size—your maze groove needs to be at least 0.5 mm larger than the marble, or it'll get stuck.
We'll be using a 6mm downcut flat endmill for most of the cuts, and then a 3mm flat end mill to drill holes for the screws and to cut the PMMA cover panel.
They're both from the Fraiser Boss Ultimate kit

Here's how we created the design in case you want to create your own.
In Fusion, create a sketch and import your maze design.
We designed ours manually in a separate vector drawing, but you can draw your own maze directly in the sketch, or use this Maze Generator for example (download the SVG version and import it in Fusion).

The most important point is that your grooves must be at least 0.5 mm larger than your marble (in our case 6.50mm)
If you need to adapt the design, you can make the groove larger or smaller by using the Modify > Offset sketch tool. Same thing if you imported an SVG maze made of single lines.
Make sure the grooves don't connect in unwanted places too (that might ruin your maze design)

Once your drawing is ready, extrude the entire shape by 18 mm (the thickness of your stock) and add a 2.5 mm deep recess (the thickness of the Plexiglas cover panel).

Then create the extrusion to carve the grooves of the maze inside the body. Make sure it's deep enough so the marble doesn't touch the cover panel: we made ours 6.5mm deep under the cover.

You can then extrude a New Body for the cover panel (and if you don't want to glue it in the end, add holes to put fixation screws like we did).

The first operation is made to create the recess for the cover.
It's a simple 2D Pocket made by selecting the contour of the recess. It uses the 6mm end mill.

Now you can create the 2D Pocket for the grooves of the maze using the same 6mm end mill (the reference is the bottom face of the grooves). You'll need to use a 2D pocket since the grooves are 6.5mm wide and the tool is 6mm in diameter.

Finally, cut the contour of the object to detach it with a 2D Contour operation, using the same 6mm end mill.

Optional: our files contain additional operations in the G-code that use a 3mm end mill.
First it will engrave numbers in the 5 objective points of the maze, and then drill the holes for the fixation screws mentioned above.
Now you'll need another setup for the cover panel since it's in a different material.
It's a very simple operation to cut the shape of the panel (and optionally to drill holes for the screws if you want some). We made ours with the same 3mm end mill used in the end of the previous operation to keep things simple.

You can now add finishes to your maze if you want—round the corners, apply a finishing coat...
Don't forget to insert the marble before putting on the cover panel, and you're ready to play!

Mekanika is a Belgian company based in Brussels whose ambition is to make local production more accessible thanks to a 100% open-source approach.
We design and produce high quality machines for CNC milling and screen printing, which have been recognized for their reliability and ease of use. Our tools are delivered as kits and fully documented, allowing to easily adapt them to specific needs.
Visit our shop to find out more, or check out our online resources and tutorials to continue learning.
This guitar was imagined and designed by Hussein of Barada Guitars, with the help of his friend Austin, who lent his expertise to the design of the CAD files.
Roldan Descamps
CEO
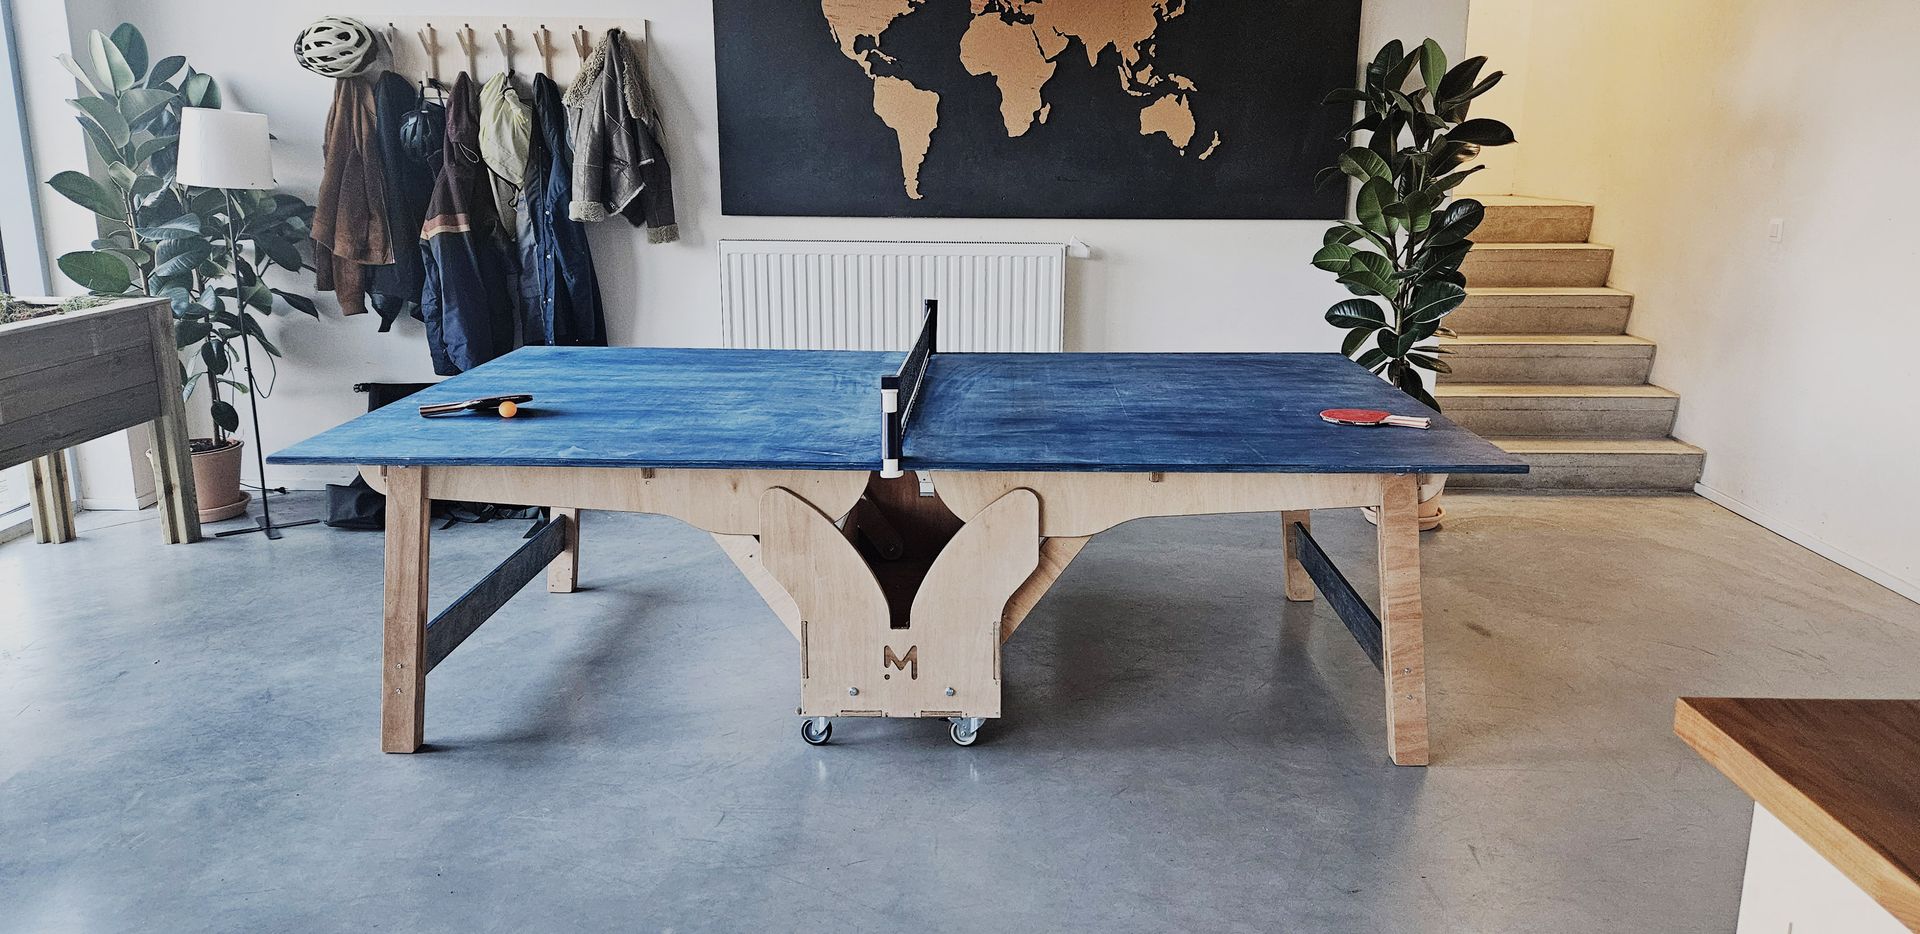
This project will guide you through the creation of a fully functional folding ping pong table entirely made of CNC cut wood panels.

Quentin Liard
Community Manager

We decided to design some acoustic panels using our own Fab CNC to both improve acoustic and embellish our meeting room.

Martin Duchêne
Head of Product Design