What is G-code?
Originally, wood- and metal-working machines were operated manually and controlled by cranks. Man power was slowly replaced by steam engine than electricity, but still controlled manually until mid-20th century.
In the '40s, John T. Parsons mounted a servomotor on the cranks to automate them and acted as one of the pioneers of numerical control for machine tools.
Then, in the '50s, engineers at MIT develop a language to communicate with the machine. This is how G-code was born - a language that allows you to send information to a machine to tell it where to go, how fast to go there, and what to do on the way. It has now been accepted as the universal language for CNC machining.
What is a post-processor ?
Post-processing is the final step where the CAM software translates the designed tool paths into G-code, that the CNC machine can understand and read to perform operations like cutting, drilling, or milling on the workpiece. Essentially, post-processing adapts the generic output from the CAM software to the specific requirements and capabilities of the particular machine being used.
Given the numerous CAM solutions available, each with its own unique features, Mekanika does not offer a custom post-processor for each one. However, you can always find a post-processor that will generate readable G-code, though some compromises might be necessary.
Note that we always recommend using Fusion360, for which there is a supported post-processor, optimized for Mekanika CNC milling machines. The installation process is described here.
G-Code is made up of strings of letters and numbers like this one, comprising different classes of machine commands.

There are different types of codes:
1. Codes that start with G are preparation functions, which indicate a specific task to the machine as it is:
- "Make a hole"
- "Mill a line"
- "Move there"
2. The codes that start with M are various machine commands. They are usually used to turn something on or off, such as a spindle or a cooling system.
3. Codes that start with D, H or T define the tools to be used and the offsets to be used with that tool.
4. Finally, codes that start with F or S define the machine's travel and rotation speeds. Literally, the "Feed" and "Speed". For more information, refer to our eponymous article.
The various codes in the G-code are divided into groups. A line of G-code is composed of several functions, but can only contain one action per group, in order to avoid errors. For example, the machine cannot be asked to drill and tap a hole at the same time.
To discover the different groups of G-code and the parameters of each function, there are reference tables, like the one of LinuxCNC.
File Format
The most crucial aspect of the G-code generated by a post-processor is its format. To be readable by a Mekanika machine, it must conform to the standard RS274/NGC G-code format. Detailed information about this standard is available here.
As long as the file is correctly formatted, it can have any extension and still be readable by your machine, including .ngc, .nc, .gcode, .tap, .txt, to name a few.
If the file is not properly formatted, it likely won't be readable by the machine.
This is why most CAM environments include a LinuxCNC post-processor by default (formerly known as EMC2), which works well with our machines.
Post-Processor Options
In your CAM environment, when you click on “Post-process” or “Generate G-code”, you will probably see a dialogue window like this one:

The important part here is the “Post properties”, they show what kind of features your G-code will have and how it will be formatted. Editing these will modify the code generated from your tool path.
Some CAM environments also offer the possibility to change the header of your code, regardless of the post-processor used. This can be very useful as well, as most of the code configuration lies there, as explained below.
Program Header
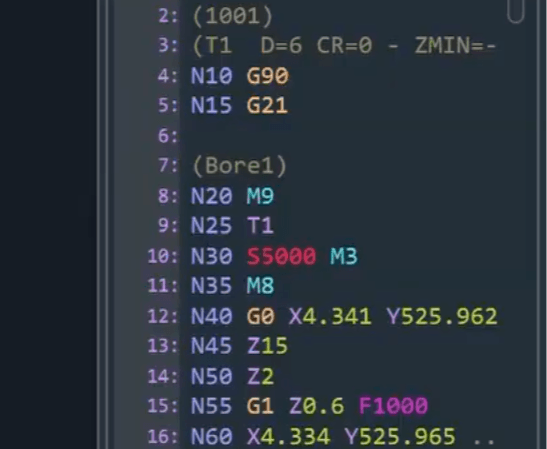
If you are using a Mekanika post-processor, your file will most likely start with the following lines, depending on the post properties you defined.

If you don’t use our post-processor, certain commands might be missing. So, let’s break it down to explain what they mean and give you an insight into how important each one is.
G90 G94 G17 G91.1 G21 - Optional
These commands are often optional, they indicate that the coordinates are expressed in millimetres, that the machine should use mm/min for F commands (feed speed), or that it should make circular motions using IJK commands.
(EVERYTHING IN BRACKETS) - Optional
These are comments, which means that the machine won’t read them and that they serve as indications for the user: tool specifications, operation names, potential warnings and errors, etc.
T1 - Important
The machine loads the tool number that was chosen for this operation, in this case, tool 1. This command is only optional if you only use one tool in your code. If you want to have a tool change in your program, you will need to define tool numbers in your CAM.
S17000 M3 - Important
M3 starts the spindle, S17000 defines the rotation speed at 17,000rpm. If you use a spindle that is controlled automatically by the machine (VFD or DI for Mekanika machines), then this command is mandatory. If it is missing, the machine will start moving without turning on the spindle;
G17 G90 G94 - Optional
Other optional configuration commands, G17 defines that we work in the XY plane, the other ones are repetitions of the commands above.
G54 - Important
This command means that the machine will move to positions related to the first work offset selected (the working coordinates you defined on your workpiece)
G64 P0.1 - Optional
Use this command if you want to use blending tolerances on your tool path (advanced and not important in most cases).
After that, you should see the first movement commands appear, namely with G0 and G01.
PROGRAM END
The end of the G-code should be more straightforward. After the last movement instructions, you should see at least these two lines:
M5 - Important
Stops the spindle, if not present, you will have to manually turn it off at the end of the program.
M30 - Important
Stops the program, equivalent to pressing the stop button on your interface or keypad. If missing, the machine will simply pause waiting for the next command.
Note that this document provides a very brief introduction to post-processor options and G-code. For further information on how G-code works with our machines, we highly recommend that you visit our download center and download the document called “PlanetCNC G-Code Reference"