Understanding & Optimizing Your Vacuum Table
Find out how to maximize the performance of your vacuum table by learning practical tips on cutting strategies, spoilerboard maintenance and many more.
Maxime G.
Product Engineering

Whenever you want to join 2 pieces using mortises and tenons, you will encounter a problem: because you’re cutting something using a spinning tool, the internal corners will be rounded, the tool can not cut 90° angles.
We need a solution, and it is called "Dogbones".
We'll teach you how to make them by hand, and how to find add-ons creating them automatically for complex projects.
Lets take a simple example:
We have this model and we want to mill it so we can fit another part inside.

But this is what the milled part will look like (it will have rounded corners brecause of the round tool):

And it will be impossible to fit another part inside because there will be interferences:

In regular woodworking, we usually remove those rounded corners with a chisel.
But in the world of CNC milling where we want to automate things as much as possible, we need a way to avoid this issue and to allow the second part to fit inside the first one.
Dogbones are the solution used: by deforming the inner angles shapes, they add extra space for the tool to go in and remove the rounded corners.
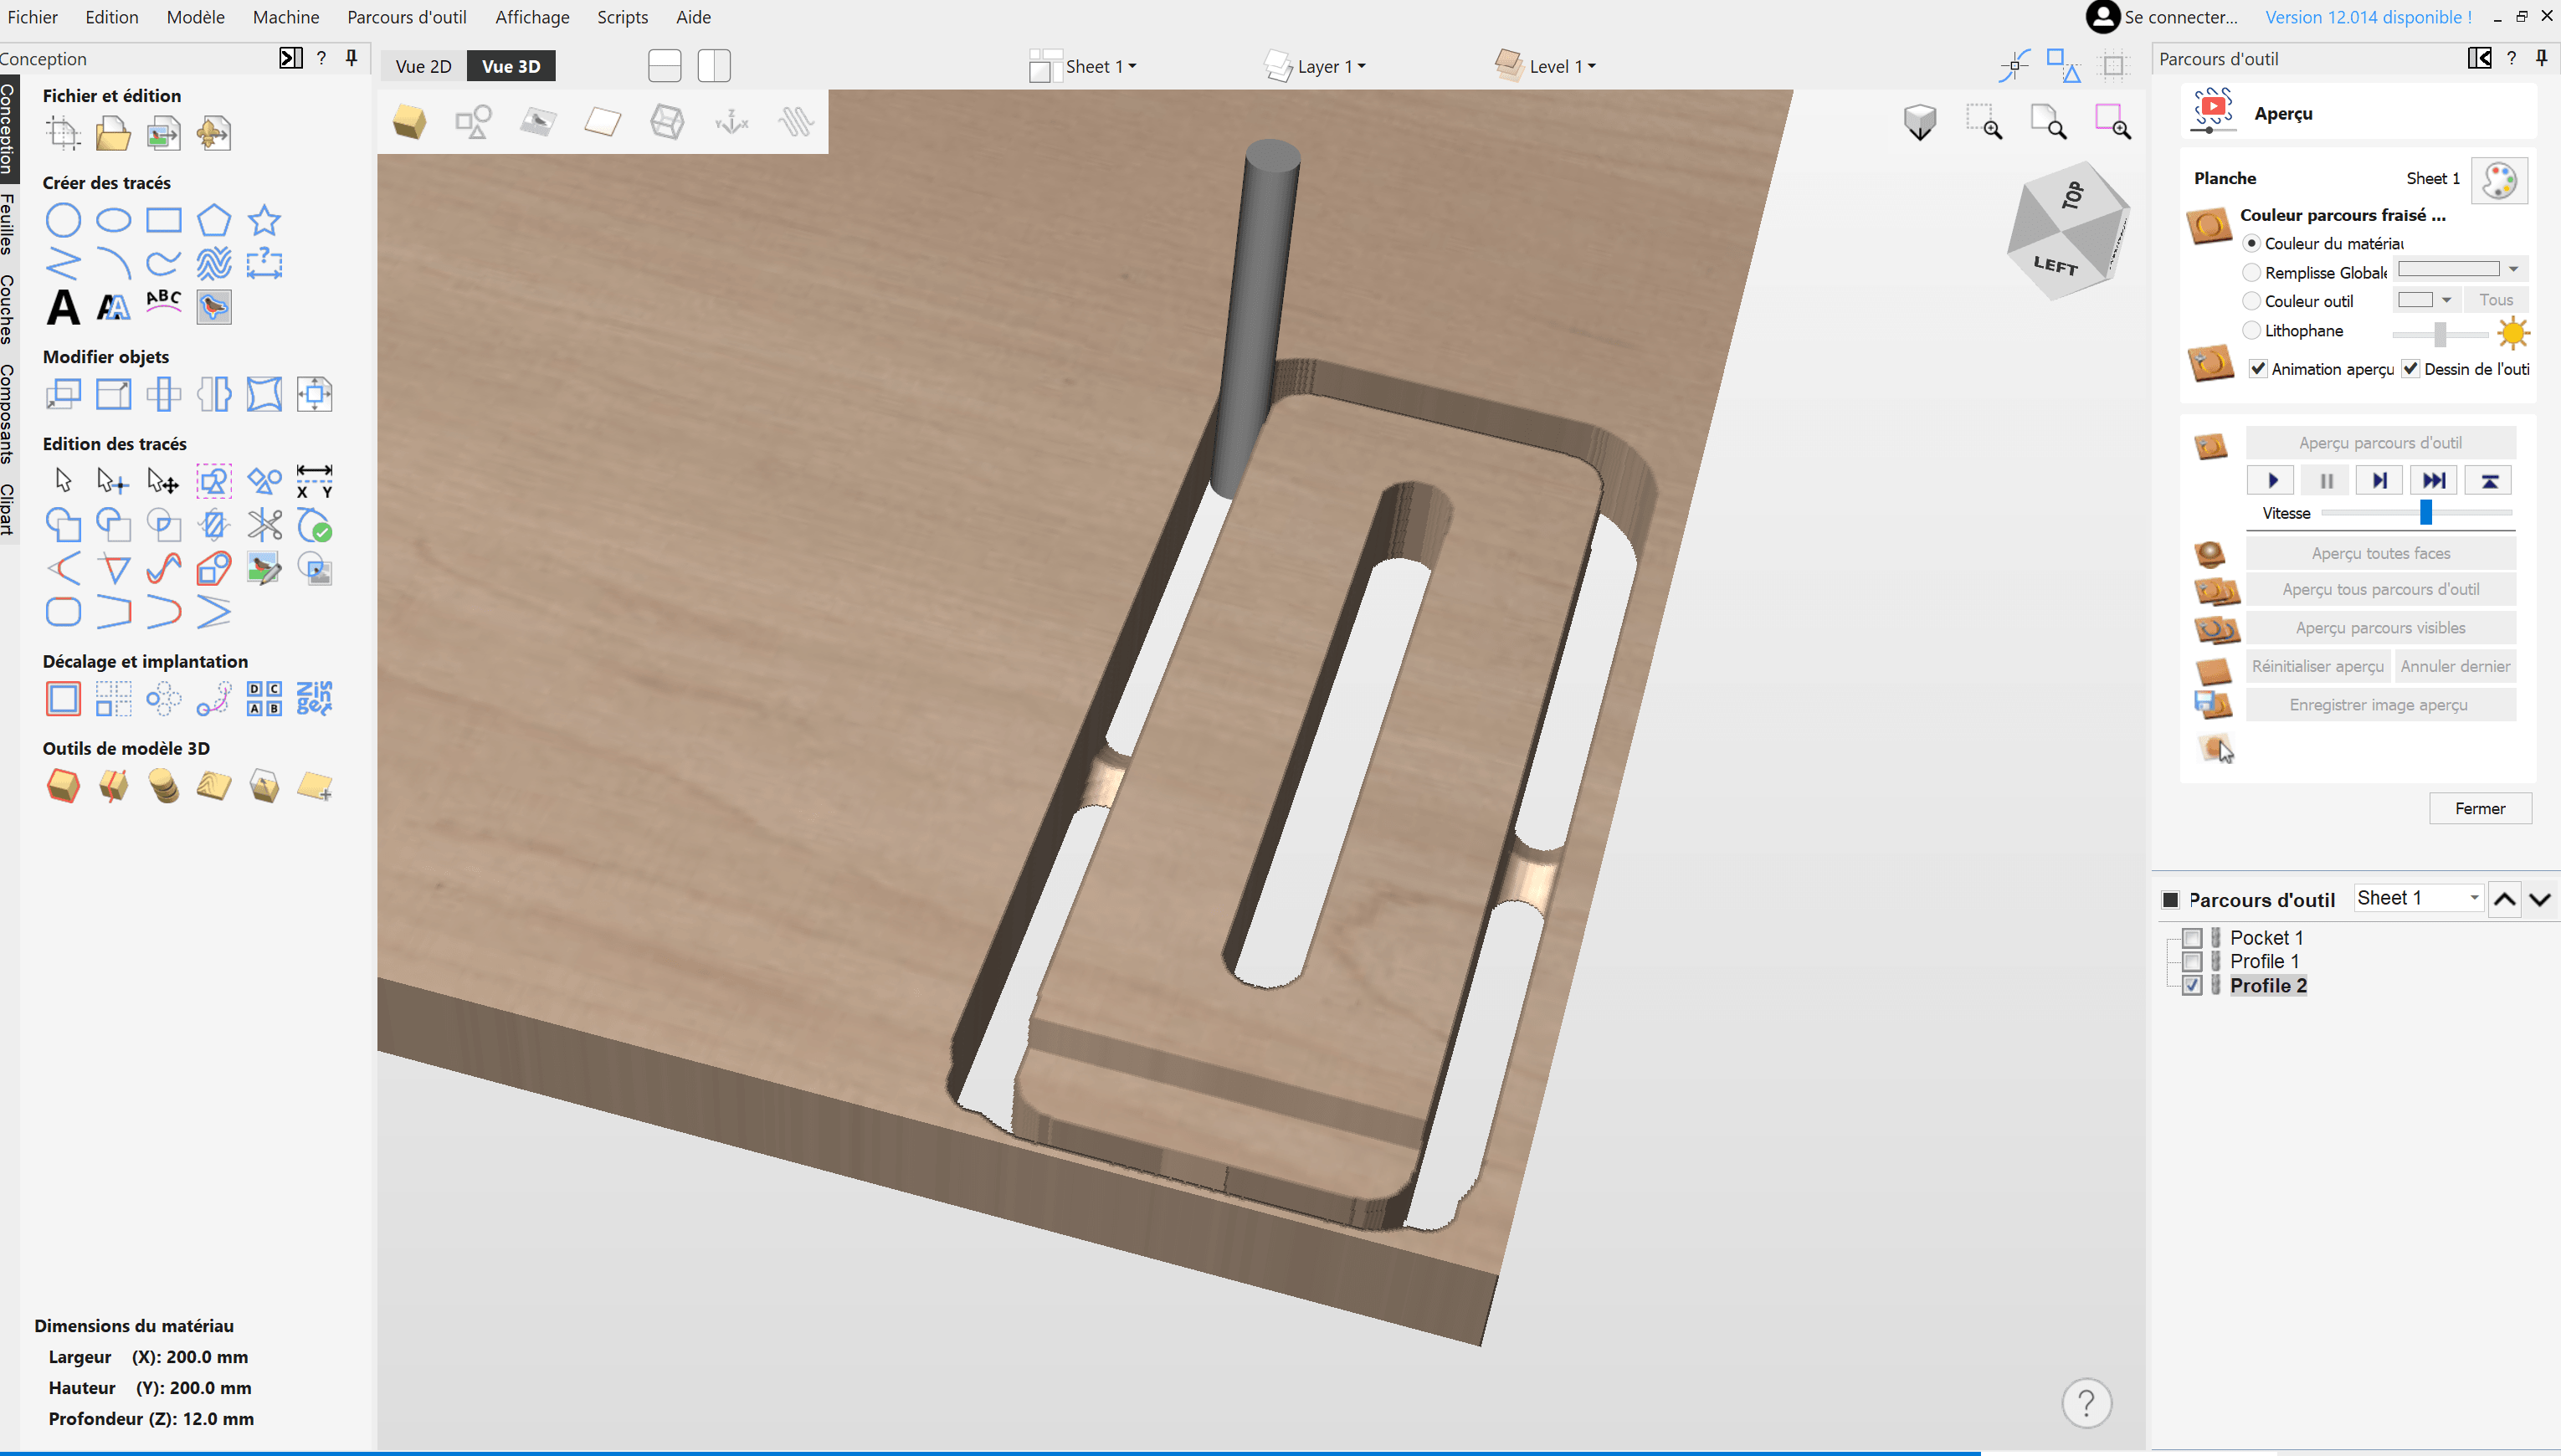
The most common dogbone solution involves integrating a circle recess of the diameter of your tool at each inner angle. This allows the corner of the other part to fit in.
However, we want this circle to be as invisible as possible, and the optimal technique for achieving this is to offset it by half the endmill diameter at a 45° (or 135°) angle.
This is the solution to avoid rounded corners that removes the less material, and therefore the most discreet. Note that the smallest the tool you use, the smallest the dogbone can be.


There is an alternative way to create dogbones that give a different aesthetic output: putting the dogbone on one side instead of on the corner.
Simply place a semi-circle of the diameter of your tool on the side of your shape, tangent to the other side of the corner, and the tool will manage to clear a 90° angle to allow assembly of a second part.
It's less discreet, but it can have its own charm.


Note that those dogbones could also be on the short side of the pocket, adding another possible aesthetic.
For those of you who are working in Fusion 360, there are super handy Add-Ins we advise you to download, that creates dogbone automatically!
This one is a totally free add-in you can download here.
Check the latest version, download the zip file in the "assets" of this version and follow this guide to install it.
It has basic functionnalities but will work perfectly for beginners or not so complex projects.
It adds a new function in Fusion that works this way:
If you are using a lot of dogbones in your designs,
we recommend this more advanced Add-in : Nifty Dogbone.
It is not very expensive and will manage updatable dogbones on any complex design perfectly.
Check their page for a lot more information and details about dogbones.
Mekanika is a Belgian company based in Brussels whose ambition is to make local production more accessible thanks to a 100% open-source approach.
We design and produce high quality machines for CNC milling and screen printing, which have been recognized for their reliability and ease of use. Our tools are delivered as kits and fully documented, allowing to easily adapt them to specific needs.
Visit our shop to find out more, or check out our online resources and tutorials to continue learning.
Find out how to maximize the performance of your vacuum table by learning practical tips on cutting strategies, spoilerboard maintenance and many more.
Maxime G.
Product Engineering
Learn how to create your project and generate G-Code from VCarve Pro or Aspire to easily machine your parts on a CNC milling machine.
Xavier K.
CNC Training
Hot engraving, cold engraving, tools and tutorials: everything you need to know about wood engraving with your CNC machine.
Quentin L.
Content Creation